Every time I mention 3D printing jewelry to someone outside the industry, they picture a machine that spits out finished rings in gold. That's not what's happening, at least not directly. What's actually happening in most workshops falls into one of two very different processes, and conflating them is where most beginners waste money on the wrong printer or the wrong resin.
One path is direct printing: you design a piece, print it in a photopolymer resin, cure it, and wear the resin object itself. The other path is print-to-cast, where the printer never makes the final piece at all, it makes a sacrificial pattern that gets burned out and replaced with molten metal using lost-wax casting, a process goldsmiths have used for thousands of years. Small jewelry businesses lean hard on the second one. Hobbyists tend to start with the first because it's cheaper and faster to see a result. Both are legitimate. They just solve different problems, and this article walks through both honestly, including where each one falls short.
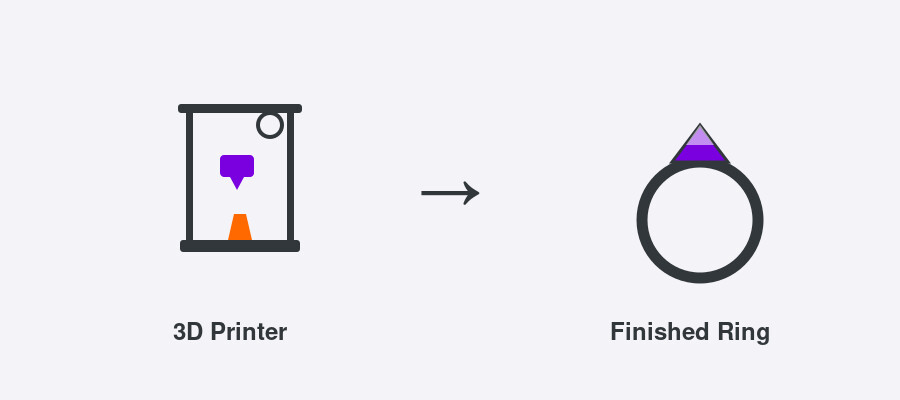
Direct Resin Printing: Wearing the Print Itself
Direct resin jewelry means you design a ring, pendant, or earring in CAD, print it on an SLA or DLP resin printer, cure it under UV light, and put it on your finger or ear as-is. No metal, no casting house, no kiln. This is the fastest way to go from idea to wearable object, and it's genuinely fun for prototyping, costume pieces, statement jewelry for a single event, or testing whether a design even reads well in three dimensions before committing real silver or gold to it.
The catch is durability and feel. Resin, even the good stuff, is a polymer. It doesn't have the density, the cold-to-the-touch weight, or the scratch resistance of cast metal. I've had direct-printed rings look flawless on day one and develop micro-scratches within a week of normal wear, keys in a pocket, typing, washing dishes. Photopolymer resins also degrade under UV exposure over months, going slightly yellow or brittle depending on the formulation. That's fine for a piece you wear to one party. It's a real problem if someone expects to wear it daily for years.
Where direct resin genuinely shines is in pieces that were never going to be cast metal in the first place, oversized statement jewelry, articulated or mechanical designs that would be a nightmare to cast, multi-color pieces if you're on a printer that supports it, or anything where the design intent is 'sculptural object' rather than 'traditional fine jewelry.'
Castable Resin vs. Standard Resin (This Distinction Actually Matters)
People use 'castable resin' and 'jewelry resin' interchangeably online and it causes real confusion. A castable resin is formulated specifically to burn out cleanly in a kiln during the lost-wax casting process, leaving minimal ash residue in the mold so the metal fills without defects. Formlabs' Castable Wax resin line is probably the most recognized example, and it's built to mimic the burnout behavior of actual jeweler's wax rather than to be worn on its own.
A standard or 'jewelry-grade' resin, by contrast, is formulated to be durable, UV-stable, and pleasant to wear directly, think the resins marketed for direct-print rings and pendants. These are not interchangeable. If you print a ring in a standard tough resin and try to burn it out in a kiln expecting clean casting, you'll often get excess ash, incomplete burnout, and a ruined mold. If you print in a true castable resin and try to wear it as a finished piece, you'll find it's more brittle and less finished-feeling than resins actually meant for direct wear.
So the first decision you make, before you even open your CAD software, is which of these two jobs you're doing. It changes the resin, it can change the printer settings (castable resins often run at different exposure times), and it changes the entire post-processing pipeline downstream.
Why Resolution and Wall Thickness Matter More in Jewelry Than Almost Anywhere Else
Jewelry is unforgiving in a way that most other 3D printing applications aren't. A miniature figure or a prototype bracket can tolerate a 100-micron layer line without anyone caring. A ring shank that's supposed to be 1.2mm thick, with a filigree pattern cut into it, cannot. Get the wall thickness wrong and the piece either snaps during printing, tears during resin removal from supports, or fails during the metal-casting burnout when the wax pattern collapses before the investment plaster has fully set around it.
This is why jewelry work pushes people toward higher-resolution machines even when the parts themselves are small. A lot of serious jewelry printing happens on DLP or LCD-based resin printers with pixel sizes in the 20-50 micron range, sometimes finer, because prongs, pave settings, and engraved detail simply don't survive at coarser resolutions. Formlabs' Form 3/4 series and various Siraya Tech-compatible LCD printers both show up constantly in jewelry maker forums for exactly this reason, the resolution ceiling is the actual bottleneck, not print speed.
Minimum wall thickness is the other constant headache. Most castable resins have a practical minimum around 0.5-0.8mm before you risk breakage during handling or investment. Designers coming from a metal-casting background who are used to hand-carving wax often push thinner than that out of habit, then wonder why half their prints snap off the build plate.
Post-Processing and Curing: The Part Nobody Budgets Time For
Printing the piece is maybe a third of the actual workflow. After the print finishes, it needs to come off the build plate, get washed in isopropyl alcohol (or a purpose-built resin cleaner) to remove uncured resin from every crevice, and then go through a UV post-cure that's timed and temperature-controlled based on the specific resin. Rush this and you get parts that are tacky, understrength, or that shrink unevenly during cure, which for a ring means it comes out slightly out-of-round or, worse, off the intended finger size.
For direct-wear pieces, there's usually a sanding and polishing stage after cure too, since even a well-tuned resin printer leaves faint layer lines that read poorly under close inspection, especially on a curved surface like a ring band that catches light constantly. For castable patterns, this step matters less cosmetically since the pattern gets burned out anyway, but any leftover support stubs or uncured resin pockets can still cause casting defects, so the cleanup discipline doesn't go away, it just serves a different purpose.
The Print-to-Cast Workflow: How Most Small Jewelry Businesses Actually Operate
If you talk to people actually running a jewelry business rather than posting hobby projects, most of them are not selling printed resin. They're 3D printing a castable pattern, then handing it off (or doing it themselves) through traditional lost-wax casting: the printed pattern gets attached to a sprue, invested in plaster inside a flask, the flask goes into a kiln where the resin burns out completely, and molten metal, sterling silver, gold, bronze, gets cast into the resulting cavity. What comes out is a real metal piece that then gets cut off the sprue, filed, polished, and finished exactly like a piece made from hand-carved wax or CNC-milled wax would be.
This is the workflow that actually replaces traditional wax carving rather than trying to replace metal jewelry outright. The printer's job is narrow and specific: produce a dimensionally accurate, cleanly burning pattern faster and with more design complexity than a person could carve by hand. Everything after that point is traditional jewelry-making, which is exactly why this hybrid approach has spread so fast through small studios, it keeps the parts of the craft that actually matter for quality (metal, finishing, setting stones) while automating the part that used to eat the most hours (carving wax by hand).
For volume or precision work, a lot of small studios don't own a kiln at all. They print patterns in-house on a Form printer or similar, then ship the printed patterns to a casting house that handles investment, burnout, and casting at scale, sometimes same batch as dozens of other clients' work. This keeps capital costs down substantially since a decent casting setup (kiln, centrifuge or vacuum caster, ventilation) is a real investment that doesn't make sense until order volume justifies it. Studios doing higher volume, or who want tighter control over alloy and finish, eventually bring casting in-house.
Casting House vs. At-Home Kiln: The Real Tradeoffs
Sending patterns to a casting house is the lower-friction option starting out. You're not buying a kiln, you're not learning investment plaster ratios, you're not troubleshooting porosity defects from bad burnout cycles. You send a clean, well-supported pattern, you get back a metal casting, and you handle finishing. Turnaround is usually days to a couple weeks depending on the house, and per-piece cost includes their labor and metal, which eats into margin on higher volume.
Running your own kiln setup makes sense once you're casting regularly enough that per-piece costs from an outside house start adding up, or when you need faster turnaround than a shared casting house can offer, or when you're doing small custom runs that a house's minimum order structure doesn't suit well. The downside is real: you're now responsible for burnout schedules, flask temperatures, metal temperature at pour, and all the ways lost-wax casting can go wrong even with a perfect pattern, porosity, incomplete fill, shrinkage porosity near thick sections. None of that is print-related, but it's the reality of owning the whole pipeline instead of outsourcing half of it.
Material and Durability Reality Check
Cast metal wins on durability, full stop, and anyone telling you direct resin jewelry is a real substitute for fine metal jewelry hasn't worn a printed ring through a normal week. Metal takes scratches and polishes back out. Resin scratches and stays scratched, or needs re-sanding and re-polishing that thins the piece over time. Metal handles temperature swings, contact with skin oils and lotions, and repeated wear without dimensional change. Resin can creep or warp slightly under sustained stress, particularly in thin sections like ring shanks, especially with cheaper or older resin formulations that weren't UV-stabilized well.
Sizing is its own headache in both workflows but shows up differently. In direct printing, shrinkage during cure is real and resin-dependent, so a ring modeled at exactly size 7 might cure slightly undersized if you don't compensate in the CAD file or validate against a physical size-check print. In casting, metal shrinkage during solidification is well-documented and predictable enough that casting houses build in standard compensation, but it's still something you need to account for rather than assume away.
None of this means direct resin jewelry is worthless. It means it's a different category of object, closer to costume jewelry or wearable art than to an heirloom piece, and it should be priced and marketed that way rather than positioned as a cheaper equivalent to cast metal.
CAD and Software: What Jewelry Designers Are Actually Using
Rhino, usually with a jewelry-specific plugin, is the closest thing to an industry standard for parametric ring shanks, prong settings, and stone-accurate CAD in the jewelry world, mostly because its NURBS-based modeling handles precise curved surfaces and Boolean operations cleanly, which matters when a stone setting needs to fit a specific gemstone to the hundredth of a millimeter. ZBrush shows up heavily on the sculptural side, organic textures, hand-carved-looking surfaces, anything that benefits from digital sculpting rather than precise parametric control. Blender has become a legitimate free alternative for both, especially once you factor in the growing library of jewelry-focused add-ons, though it still has a smaller footprint in professional studios that grew up on Rhino.
Whichever tool you use, the file needs to end up as a clean, manifold STL or 3MF with correct wall thicknesses and no non-manifold geometry, since resin slicers are far less forgiving of messy meshes than FDM slicers tend to be. A model that looks fine on screen but has internal geometry errors will often print fine and fail during support removal or casting in ways that are hard to trace back to the original file.
Is It Worth It? A Straight Answer for Hobbyists and Small Businesses
For a hobbyist who wants to make a few pieces for themselves or as gifts, direct resin printing is absolutely worth it. Entry-level resin printers are inexpensive, the learning curve is manageable, and you get a finished, wearable object in an afternoon. Just set expectations correctly going in: you're making costume-grade jewelry, not an engagement ring replacement, and that's fine.
For a small business selling actual fine jewelry, the print-to-cast workflow is where the real money is, and it's worth investing in once you have consistent design work to justify it. A decent resin printer plus castable resin plus either a casting house relationship or in-house kiln setup lets you produce complex, precise designs faster than hand-carving wax, at a fidelity that's genuinely competitive with traditional bench jewelers on complex geometry. The upfront learning curve on lost-wax casting itself, separate from the printing, is the part people underestimate. Budget time to either learn it properly or find a casting house you trust before you promise delivery dates to customers.
The honest middle case, someone who wants to sell resin jewelry directly, unfinished by metal casting, is the toughest to make work long-term. It can generate initial sales because it photographs well and undercuts metal jewelry on price, but repeat customers tend to notice the durability gap fast, and reviews reflect it. If that's the plan, treat it as a distinct product category with honest marketing rather than jewelry-in-disguise.
Frequently Asked Questions
Q: Can you 3D print jewelry directly in gold or silver?
A: Not with standard desktop or professional resin/FDM printers, those print in resin or plastic. Metal 3D printers (DMLS/SLM) exist and can print precious metals directly, but they're industrial-grade, expensive to operate, and rare outside large manufacturers. The overwhelming majority of '3D printed metal jewelry' you see is actually print-to-cast: a resin pattern printed and then cast into metal using traditional lost-wax casting.
Q: What's the difference between castable resin and regular jewelry resin?
A: Castable resin is formulated to burn out cleanly with minimal ash residue during kiln burnout, so it's meant to be destroyed and replaced by molten metal in lost-wax casting. Regular jewelry-grade resin is formulated for durability and UV stability because it's meant to be worn as the finished piece. They're not interchangeable, using the wrong one leads to either bad casting results or a piece that degrades quickly on your finger.
Q: How durable is 3D printed resin jewelry compared to cast metal?
A: Meaningfully less durable. Resin scratches more easily, doesn't polish back to a like-new finish the way metal does, and can degrade or slightly warp with prolonged UV exposure and daily wear. It's fine for occasional-wear or statement pieces but isn't a real substitute for cast metal in daily-wear fine jewelry.
The Bottom Line
3D printing jewelry isn't one thing, and the sooner you figure out which of the two workflows you actually need, the less money you'll waste on the wrong resin or the wrong printer. If you want a wearable object fast and you're fine with costume-jewelry durability, direct resin printing on something like a Form printer or a good LCD machine will get you there in an afternoon. If you're building a business around real fine jewelry, the printer is a tool for making better wax patterns faster, not a replacement for the caster's kiln or the bench jeweler's polish. Most people who stick with this long-term end up doing both at different stages of the same design process.